Saturday, April 14, 2012

How to Apply Foundation

There are so many types of foundations, and ways to apply it. One of my classmates asked me how to apply foundation. Through our conversation, I learned that she was taking this family communication class as a requirement in becoming a police officer! Some women (like her) have never become interested in makeup until they realize the benefits of wearing makeup in their career. Others, like me, have been using makeup to conceal imperfections since they were preteens. Here is how to apply foundation:

Fingers are what everyone is blessed with and usually start with. Use clean fingers so you don't apply germs to your delicate skin. Fingers are great to blend in moisturizers, BB creams, primers, or foundations. They can even rub off too much blush, wipe away stray eyeliner, or pat creased eye shadow out.

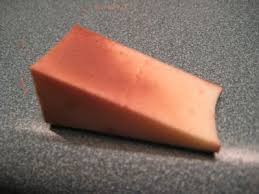
Sponges are a great way to apply foundation. Sponges have evolved from the disposable wedges to a reusable egg shaped sponge. These new sponges have so many advantages and are best used when moist. I have found the best way to use is when I wash my face to get the sponge soaking wet then and squeeze out all of the water and set it to the side of the sink while I moisturize and brush out my hair. Use clean fingers to dab foundation on forehead and cheeks. Bounce the sponge across the face to apply foundation, using the small tip around eyes and nose.

Stippling brushes claim to offer an airbrushed appearance. They commonly feature black hairs with fewer white synthetic hairs sticking out. Use the brush to tap foundation into your skin and swirl the brush to blend it well. I found a way to apply foundation is to tap the bristles into my wet palm before tapping into foundation.

Paddle brush is an old stand by for applying foundation. It smears the foundation across skin, but doesn't offer much blending ability, I often found myself using fingers to blend edges and little areas around my eyes and nose. I picked up my ELF brush for $1.
 
Kabuki brushes are a must for buffing mineral foundations into skin.  They usually are bigger and denser brush with a short handle that makes buffing easier.

Sunday, April 1, 2012

Prevent Aging Cheaply

Recently aging has been shoved into my face. It feels that in no time I will be leaving my 20s and entering the 30s. I have been worrying about age spots, scars, crow's feet and gray hairs. I feel that I am aging too fast but I don't need to be a finance analyst to know I'm broke at the moment. What can girls do to ward off aging while on a tight budget?

Use sunscreen! As long as it doesn't say it's expired it will still work. If the expiration date has worn off and it's past two years old then I would replace it.

Lotions of any type will still work; even the cheap stuff from the dollar store can work. When it comes down to it, skin needs daily moisture no matter the season and even the cheap stuff can work in a pinch. When funds are more readily available, it is better to purchase a higher quality moisturizer, especially for the face. 

Loosen up when working out. So many women tighten up their facial and neck muscles when exercising and it only causes further unnecessary strain, it will show as you age down the road. 

Drink lots of water, but be careful. Experts recommend using a BPA-free plastic or aluminum water bottle you can sip from. Anything which you suck from like a straw or squirt top causes you to make a pursing motion with your lips. With time lines could develop, I remember my grandma asking me "Do you want your face to freeze like that?" I try to drink from a glass at home, where the bathroom is readily available too. 

Prevent wrinkles in your sleep! Use a satin pillowcase, and try to sleep on your back. As you sleep on your sides or belly you squish your face, and over time this could cause wrinkles. Using a cotton pillowcase can pull on sensitive skin while satin is slippery and won't cling to the face as easy. 

Sunday, March 25, 2012

False Eyelashes

With weddings and graduation parties just around the corner, what is a way a student can glam up their appearance? False eyelashes can add length, thickness, and fullness to those tiny hairs that frame your eyes. They can look very natural when applied correctly, and will reduce the amount of mascara or eye makeup used. This is even better in summer when avoiding a makeup meltdown during those stressful summer moments. They should be applied to open and draw attention to the eyes, but not be obviously false. There are many options for everyone, from drugstore lash strips to professionally applied eyelash extensions.

It depends on the occasion I feel on what type of lashes you should use. I recommended to a friend getting married having a more semi-permanent option of eyelash extensions applied by a professional. She is planning an outdoor wedding this summer and a tropical honeymoon. Eyelash extensions will help give her a more awake appearance, even when she hot doesn't want to wear much makeup in the tropics. She will still look good without any makeup in these pictures that will remind them of their special trip. They are quite affordable as well; she booked an appointment at a local salon for the day before her wedding date and believes it will be under $200 for lashes they say can last up to 4 weeks.

For a night out with friends, I applied a strip of false eyelashes the other night. It can be hard for someone to apply that has never done it before, so here one of my favorite YouTuber JulieG explains all about it.  I wanted the focus on my eyes, so I applied primer potion and Verve from the Naked 2 palette with blackout in the crease and Virgin from the original Naked palette. I lined with Urban Decay 24/7 liner pencil in Zero. I used Ardell brand I had purchased from Sally Beauty Supply, they very affordable for a broke student always on the hunt for scholarships for women. I applied the lashes with DUO eyelash glue in the dark tone; Revlon has a good glue for anyone sensitive or allergic to DUO. Looking down into a mirror on the counter I glued the false lashes to my skin next to my natural lashes, not the real lashes themselves. After the glue dried I curled my lashes to help blend the false with my real lashes, and applied one coat of mascara. After doing my eye makeup I finished the rest of my face so I wouldn't have to clean up any mistakes. When I take them off, I used a bit of makeup remover on a cotton ball and held it to the lashes for about 20 seconds before trying to peel them off and wash my face up for bed.

One of my friends is very shy about using much makeup, so I convinced her to let me apply some individual bunches of lashes to her eyes. It gave her a little more attention to her eyes. I only applied two to the outer corners of her eyes, holding onto them with a pair of tweezers. She loved it! Even people nervous about false lashes can have a great experience and appearance with the correct products and techniques.

Friday, March 16, 2012

Self-Tanning 101

As spring is approaching for some, and already here for others, now is the best time to try out self-tanners! Most smart college students want that sun kissed appearance without wrecking your skin no matter if you are attending Saginaw Valley State University or St. Leo University. Here are some tips and tricks for turning your ghostly pale legs into stems of a sun kissed goddess.

Try an allover color; I really enjoyed a Mystic Tan HD at my local tanning salon. I was perfectly tan returning from spring break, only my tan was safer and less painful than friends who went to Florida and spent a week in the sun.
Gradual tanners are good if you are nervous about starting. The best part is that it delivers moisture daily which your winter parched skin needs. The tan builds after a week or so of application, however needs to be maintained every day or every other day. Jergen’s Natural Glow is a great product for those starting.
Spray on tanner is easier for me to reach difficult places, like behind my shoulders. I also love that you don't have to worry about your palms turning orange! I enjoy L’Oreal Paris Sublime Bronze, and there's a coupon on their website! Bliss a Tan is another good one too and shows where you have applied product! Both take time however to fully develop your tan.
Some products that work almost immediately are wonderful! I really liked using Body Drench Quick Tan Mist because of how quickly the tan developed, almost instantly which helped when applying the product as well. 
A wonderful face tanner is Clarins Intense Bronze Self-Tanning Tint which offers an immediate color, but develops further over a few hours.

There are a few steps you can do in helping yourself to not streak when applying any self-tanner. Firstly you want to be exfoliated, meaning all of the dead skin cells have been sloughed off exposing the fresh skin below. One of the cheapest ways to exfoliate is to take 1/4 cup of sugar, mix it with honey and a tiny bit of water. After taking a shower when your skin is warm and moist, gently rub this onto your skin and rinse off, then shave your legs. When done, towel dry off and begin applying your chosen tanner. Before beginning you could apply an oil free lotion to problem areas that tend to suck up lots of color and look odd, like the back of your ankles, knees, and elbows.
Have someone to help you with your back and other difficult to reach areas. Don't forget behind your ears and the back of your neck! As soon as you complete one area of the body, wash your hands before moving onto another area. Wait about 10 minutes to be completely dry before applying your favorite body lotion.
One last trick is to apply a bright or pale polish to toes. Dark polish makes you look pale.
This photo is after my Mystic Tan in the color "Glow" last week.

Saturday, March 10, 2012

Must Have Hair Products & Tools

There are certain things that every woman needs in her bathroom to take care of hair regardless of length, color, or texture. These are what you can find in my bathroom:

Shampoo and conditioner are a must have. There are hundreds of choices from high end brands and drug store brands. I would recommend a sulfate free shampoo designed for your type of hair needs. Sulfate shampoo is great for maintaining brilliant color; L'Oreal Paris offers a great line that is very affordable.
Hair spray is very important to keeping fly aways down and styles maintained. Flexible hold is a great multipurpose for all lengths and textures. I love Aussie and Suave brands for their holding power and affordability.
Heat protectant spray is important for the woman who uses hot tools on her mane. I really enjoy Tresemme because it seems to work well at preventing split ends.
Dry shampoo is great for those rushed mornings! A few sprites really will help to control oil and banish any smells from dinner last night. I spritz some Tresemme dry shampoo on my roots and the hair framing my face and allow sitting while I wash my face and brush my teeth. After letting it sit for a few minutes, brush your hair and shake out the product to give some body to your hair.
A multi-use flat iron is necessary. I love the wet to dry flat irons that you can use to straighten or curl your hair. This is something to invest money into because it will last for the long-haul and treat your hair easier. Chantilliscious has a great review on her newest purchase from Flat Iron Experts.
A blow dryer is a must have items in every woman's bathroom. Again, this is a tool to invest in for the long haul so it will last for years to come. I love this one from Flat Iron Experts. 
Conditioning treatments are important as well to maintain healthy hair. I enjoy Ion Color Solutions conditioner.


Sunday, March 4, 2012

Homemade Healing Facial Mask

As a woman with oily combination skin, I have many problems I'm sure other women share as well. Recently at a department store, I ended up discussing my skin concerns with the sales woman. She recommended the Clear Improvement Mask from Origins. It seems quite expensive for such a small bottle however. I'm a broke college student looking for as many scholarships and grants as I can find, even the crazy scholarships! I have to be careful about my spending, so I did some research and decided to create my own mask with items found at the health food store. In the end it cost nearly the same amount of money as the premade mask; however I have about 50 times the amount of product now.

Indian Healing clay has been raved about in many YouTube videos and blogs. The clay is supposed to pull out all of the toxins from the skin, leaving it refreshed.
Active charcoal is known to pull toxins from the skin. It can stain surfaces quite easily however, and could cause a tattoo effect in any open cuts or sores. You want to get capsules so it is in a powder form that is easily accessible.
Aloe Vera is a known natural healing plant. It has a soothing, moisturizing effect when applied to the skin.

Before beginning, be sure to wear a black shirt and do this at night in case of any staining. Plan on rinsing it off in the shower because it is so messy. Being ever so careful, I opened 2 charcoal capsules by twisting and pulling them apart. I did this inside of the stainless steel sink so I wouldn't stain the counter. I dumped the contents into a ceramic bowl. Use the bowl to catch any falling debris as you carry the empty capsules to the trash. Then add about an equal amount of the Indian Healing clay to the bowl. Finally, using a Q-tip, I stirred in about 1/2 a teaspoon of natural Aloe Vera juice. It should form the consistency of a paste, not too runny or too thick.

I applied the mask to clean skin and waited about 20 minutes before rinsing off in the shower. It had a very tight feeling and felt like my face was pulsating. It splattered as I rinsed my face off, however did not stain the shower because I rinsed it off right away. When I was finished, it left a tight feeling. I patted my face dry and applied a thick facial lotion right away. I recommend this mask to the average person about once a week, for oily or combination skin about two or three times a week should be sufficient. 

Saturday, February 25, 2012

Beauty Mistakes

When wearing makeup, there are some things that you can do that are just wrong. Here are some things to avoid, and how to correct your bad habits.

Not washing at the end of the day is the worst thing you could do. There are so many ways to wash up, even water-free ways with towelettes! Take care of your skin and it will thank you over the many years to come.
Wearing the wrong shade of foundation is a huge mistake. You want to match it to your skin tone, not too light or too dark. If you purchase a new foundation and discover it is the wrong shade, most stores will allow you to exchange for the correct shade.
Trying to overdraw your lips on can make you look like a porn star. You want to choose a lip liner that matches your lipstick, not too dark or too light. Also be sure to follow the natural line of your lips, don't go past to make them look fuller, it doesn't work.
Don't over-tweeze your eyebrows. You risk making your face look very unnatural and not growing back in fully. Follow the natural arch of your eyebrows or seek professional help to get them waxed and try to maintain the lines and shape they left you with.
Don't wear too many eye shadow colors at once. I had a friend who thought blue eye shadow paired with purple in her crease looked high fashion, yet I thought she looked like a clown.
Be careful when wearing glitter. Chunky glitter can travel, making you look like Lady Gaga, and not in a pretty way.
Don't go nuts with illumining products; you can end up looking kind of freaky. Instead use some in the inner corners of eyes, under the brow bone, and a little on the top of your cheek bones.
Using dirty brushes is a big no-no. You can spread germs, dirt and dust. Give them a deep clean washing at least once a week using a brush shampoo, or an antibacterial dish soap mixed with equal parts of extra virgin olive oil. Dry and shape brushes by hand, or with a brush roll designed for it. Every day you should quickly clean them after use, I use a baby wipe spritzed with rubbing alcohol.